


Gilded Flutter
Gilded Flutter
Buy 2+ Nail Sets & Get FREE Shipping
Couldn't load pickup availability
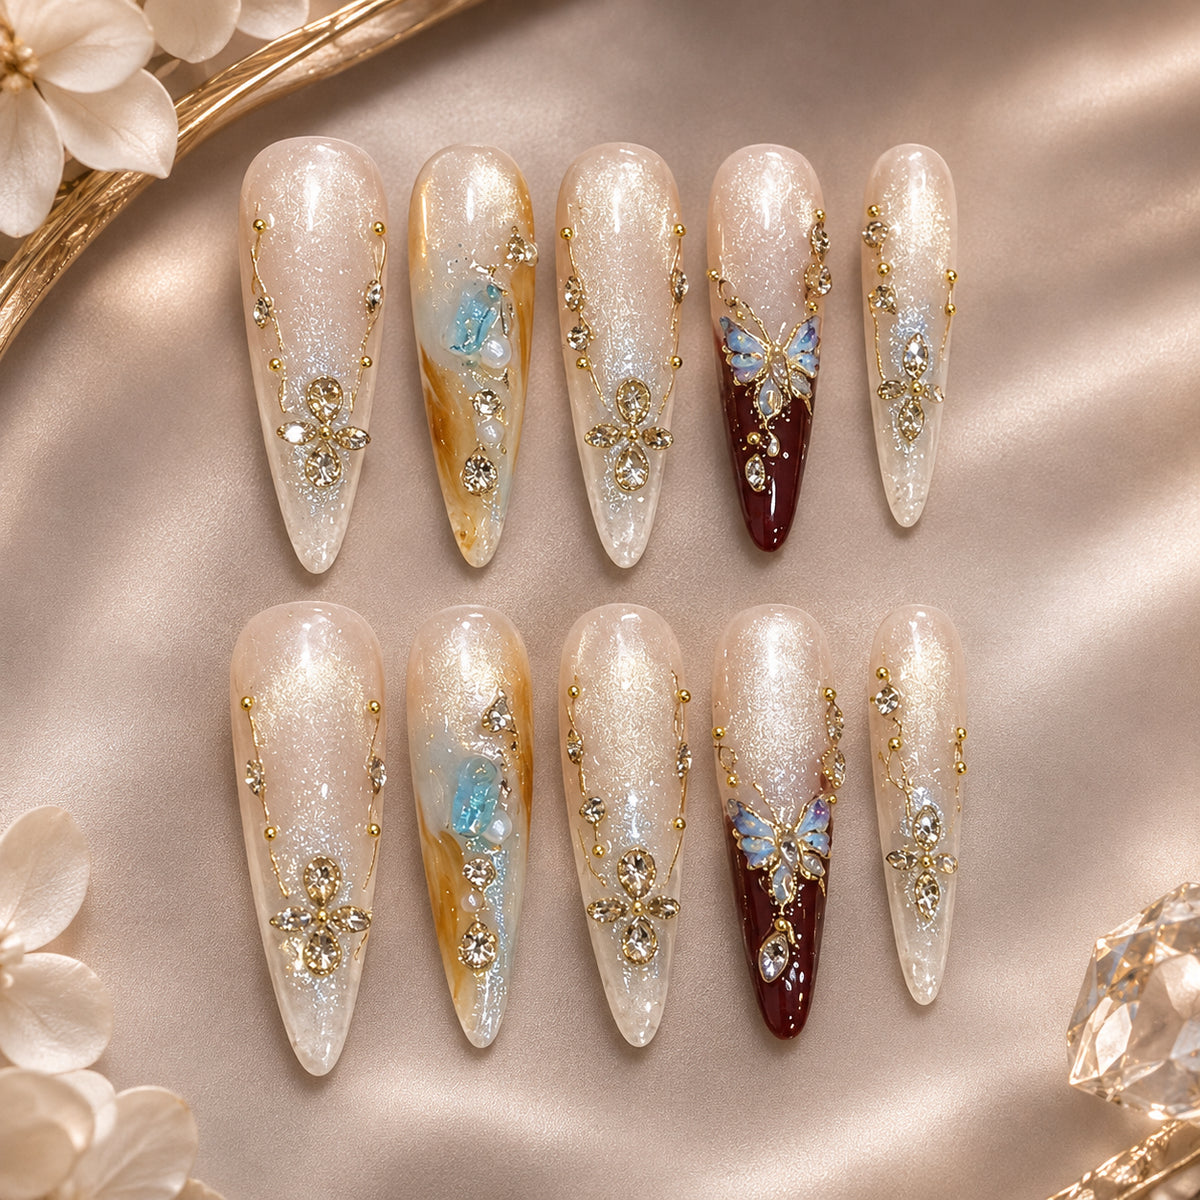
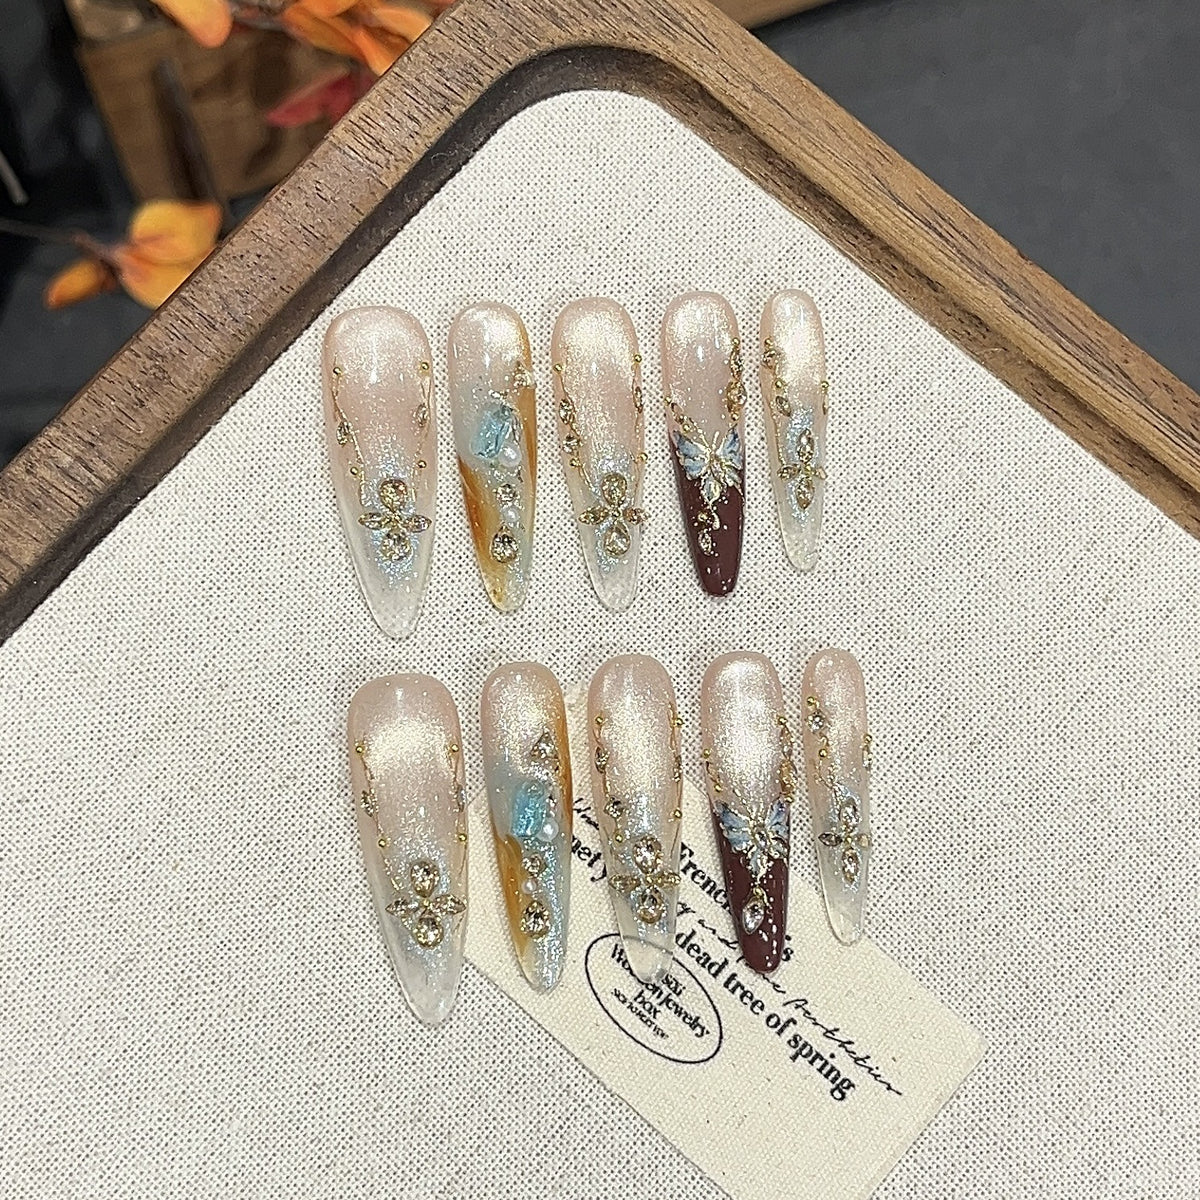
Champagne shimmer meets delicate butterfly accents, intricate gold detailing, and sparkling crystal embellishments. A luminous, romantic design with a luxurious mix of soft elegance and statement sparkle.
- Luxury Nail Art
- Reusable Nails
- Nail-Friendly
What's Included
What's Included
Each nail set includes:
- 10 Press-On Nails
- 1 Nail Storage Box
- FREE Jelly Glue Tool Kit (see FAQ below for details)
Everything you need for easy at-home application with jelly adhesive tabs.
Shipping & Delivery
Shipping & Delivery
- Processing Time: Ships within 3 business days.
- Delivery Time: Estimated 6–12 calendar days after dispatch.
- Shipping Fee: $10 for one nail set.
- Free Shipping: Buy 2 or more nail sets and enjoy free shipping.
- Order Tracking: Tracking information will be provided once your order ships.
Delivery times are estimates and may vary due to customs or carrier delays.
Returns & Refunds
Returns & Refunds
Due to hygiene considerations, we do not accept returns or refunds for change of mind or incorrect size selections.
If your order arrives damaged, defective, or incorrect, please contact us at info@chicpetal.com for assistance.
How to Measure Your Nails?

| SIZE | Thumb | Index | Middle | Ring | Little |
| XS | 14mm | 10mm | 11mm | 10mm | 7mm |
| S | 15mm | 11mm | 12mm | 11mm | 8mm |
| M | 16mm | 12mm | 13mm | 12mm | 9mm |
| L | 17mm | 13mm | 14mm | 13mm | 10mm |
FAQ
What's Included in A Nail Art Set?
What's Included in Your Nail Set?
Every nail set includes:
- 10 press-on nails
- 1 nail storage box
- 1 FREE Jelly Glue Tool Kit
FREE Jelly Glue Tool Kit
Your complimentary application kit includes:
- 3 sheets of jelly adhesive tabs
- 1 wooden cuticle stick
- 1 nail file
Jelly adhesive tabs are easy to apply and remove, making them a convenient choice for temporary wear. Wear time varies depending on application and daily activities.
Optional Add-On: Solid Adhesive Gel Kit — $10
Looking for an alternative adhesive option? You can purchase our Solid Adhesive Gel Kit separately for an additional $10.
The kit includes:
- 1 solid adhesive gel (10 ml)
- 1 AD-1 debonder
- 1 UV lamp

Important: Not Suitable for Dark or Opaque Nails
Solid adhesive gel requires proper UV/LED light curing. Dark, black, or opaque press-on nails can block the light and prevent the gel underneath from curing completely.
For these designs, we recommend using the included jelly adhesive tabs instead.
Always follow the adhesive manufacturer's application and curing instructions. Do not wear nails over uncured gel.
Choose the application method that works best for your nail design.
How to Measure the Size of My Nails?
| SIZE | Thumb | Index | Middle | Ring | Little |
| XS | 14mm | 10mm | 11mm | 10mm | 7mm |
| S | 15mm | 11mm | 12mm | 11mm | 8mm |
| M | 16mm | 12mm | 13mm | 12mm | 9mm |
| L | 17mm | 13mm | 14mm | 13mm | 10mm |
How to Apply and Remove Press-on Nails?
Beautiful nails start with the right preparation. Follow our simple guide to apply, remove, and care for your ChicPetal press-on nails.
1. Before You Begin
- Wash your hands and dry them thoroughly.
- Gently buff the surface of your natural nails using the included nail file. Avoid excessive filing.
- Clean your nails with an alcohol wipe to remove oils and residue, then allow them to dry completely.
- Select the correct press-on nail size for each finger before applying.
Please Note: Alcohol wipes are not included due to shipping restrictions. Please prepare your own.
2. How to Apply Jelly Adhesive Tabs
Jelly adhesive tabs are FREE with every ChicPetal nail set.
Application Steps
- Select an adhesive tab that fits your natural nail without touching the surrounding skin.
- Apply the tab to your clean, dry nail and press firmly.
- Carefully peel away the protective film.
- Align the press-on nail with your cuticle, then gently lower it into place, pressing from the base toward the tip to minimize air bubbles.
- Hold firmly for approximately 30 seconds.
Application Tips
- Avoid water and excessive moisture immediately after application.
- Apply to clean, dry nails for better adhesion.
- Wear time varies depending on nail preparation, application, and daily activities.
- Do not apply over irritated, damaged, or infected nails.
3. How to Remove Jelly Adhesive Tabs
Removal Steps
- Soak your fingertips in comfortably warm, soapy water to help loosen the adhesive.
- Gently move the press-on nail from side to side to check whether the adhesive has loosened.
- If needed, use a wooden cuticle stick to carefully assist removal without forcing the nail.
- Continue soaking if you feel resistance. Never pull or pry off a firmly attached nail.
- Gently remove any remaining adhesive and clean the press-on nails.
- Allow the nails to dry completely before storing them in their box.
Care Tip: Gentle removal helps protect your natural nails and may allow your press-on nails to be reused, depending on their condition.
4. How to Apply Solid Adhesive Gel
Optional Add-On — $10.00
Our Solid Adhesive Gel Kit is sold separately and is intended only for compatible press-on nails.
Application Steps
- Using the underside of the press-on nail, scoop out an appropriate amount of solid adhesive gel, approximately one-third of the nail tip's capacity.
- Place the press-on nail onto your natural nail and gently press from the center toward the edges to minimize air bubbles. Use a wooden cuticle stick to carefully remove any excess gel before curing, avoiding contact with your skin.
- Keep the nail in position and cure using a compatible UV lamp according to the adhesive manufacturer's instructions. Ensure the entire adhesive layer receives sufficient light.
Important Safety Tips
- Solid adhesive gel requires complete UV curing.
- Do not use with dark, black, or opaque press-on nails, as these designs may block curing light.
- Additional curing time cannot reliably compensate for insufficient light transmission.
- If compatibility or complete curing cannot be confirmed, use the included jelly adhesive tabs instead.
5. How to Remove Solid Adhesive Gel
Removal Steps
- Apply AD-1 debonder along the edges of the press-on nail. Allow the recommended time for the adhesive to soften.
- Once the adhesive has loosened, carefully use a wooden cuticle stick to lift the press-on nail from the edge. Work slowly and gently until the nail releases. Never force or pry off a nail that remains firmly attached.
- After removal, carefully remove the softened adhesive from the press-on nail. Clean the nail and allow it to dry completely before storing.
Important Removal Tips
- Avoid contact with irritated or damaged skin.
- Never pull or forcefully remove press-on nails.
- If the adhesive does not loosen as directed, stop and seek assistance from a qualified nail professional.
- Reuse depends on the condition of the press-on nails after removal.
6. Choosing the Right Adhesive
Jelly Adhesive Tabs — FREE
- Included with every ChicPetal nail set
- No UV lamp required
- Convenient for temporary wear
- Suitable for many dark and opaque nail designs
Solid Adhesive Gel Kit — $10.00
- Sold separately
- Requires a compatible UV curing system
- Only for nail tips verified as suitable for light curing
- Not suitable for opaque or incompatible nail designs
Need Help?
For questions about adhesive compatibility or nail application, contact us at info@chicpetal.com.
We aim to respond within 1–2 business days.